Through code examples and screenshots, we will show how you can utilize Konvoy to simplify Cluster patching to ensure that your Clusters stay secure and healthy through the lifetime of the Cluster.

Aug 05, 2020
Weston Bassler
D2iQ

4 min read
Recently we hit the infamous kmem bug in our internal Production Konvoy Cluster. We discovered that we were having this issue after users began reporting a particular CI Job was failing intermittently throughout the Cluster with the following error:
From the Pod Logs:
2020-04-28T12:49:14.068308575Z time="2020-04-28T12:49:14.068177914Z" level=error msg="stream copy error: reading from a closed fifo"2020-04-28T12:49:14.128018188Z time="2020-04-28T12:49:14.127915909Z" level=error msg="16997c1a57932d0e9f1d5ab5eba732703e8432205cbeaa9a5401aa68b0cd34d7 cleanup: failed to delete container from containerd: no such container"2020-04-28T12:49:14.128049255Z time="2020-04-28T12:49:14.127961679Z" level=error msg="Handler for POST /v1.39/containers/16997c1a57932d0e9f1d5ab5eba732703e8432205cbeaa9a5401aa68b0cd34d7/start returned error: OCI runtime create failed: container_linux.go:346: starting container process caused \"process_linux.go:319: getting the final child's pid from pipe caused \\\"EOF\\\"\": unknown"
From the Kernel Logs:
[Tue Apr 28 12:49:09 2020] kmem_cache_create(nf_conntrack_ffff8d4c883c0000) failed with error -12
The particular CI job that was failing was using a docker-in-docker image to create a Kind Cluster in order to test our D2iQ Helm Charts against a running Kubernetes Cluster. Although the error appears to be intermittent, it causes a major disruption in our process for shipping and testing code each time it fails. Since all of our worker nodes are susceptible to this issue and the CI Job could run on any of them at any time, we needed a process for patching our worker nodes to ensure that we could keep our Cluster and the workload healthy. Luckily, this process has been made very simple using Konvoy.
In this post, we will describe how we used Konvoy to patch our worker nodes to resolve our kmem issue in our Production Konvoy Cluster. We will begin by describing how we first tested a solution and then end by describing how we deployed the fix to the entire Production Cluster without interruption. Through code examples and screenshots, we will show how you can also utilize Konvoy to simplify Cluster patching to ensure that your Clusters stay secure and healthy through the lifetime of the Cluster. You may utilize some of the steps here as part of your Cluster patching policy or for some other issues that may arise at some point, such as the one mentioned in the post.
The Test
The errors we are seeing are a known issue that appears to be tied to CentOS, the OS we are running within our Cluster. Currently, the only known workaround and one that you will find most common is to completely disable the kmem accounting feature at boot time. It is best practice and has been suggested within several articles that we should also update to the latest available kernel, since the one we currently use is a little behind on updates.
We decided to test the above mentioned solution using the “Node Pools” feature in Konvoy to deploy one new worker node with an AMI containing the latest kernel. For the test, we decided to taint the node so only our test Pods could be scheduled to run on that new test node. Adding this new worker node via a new Node Pool to our Cluster only requires two simple steps in Konvoy:
- Add a new Node Pool to your cluster.yaml but with a count of 1. We also applied the pool with taints and tolerations so that no other workload could be scheduled there except for any test jobs we decided to run there.
konvoy create nodepool testnode konvoy scale nodepool testnode --count 1
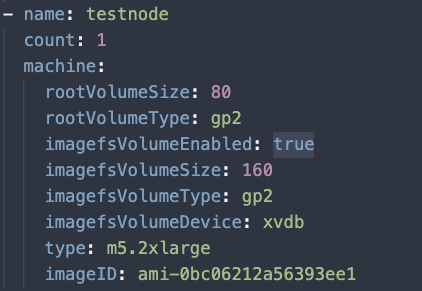
In the “ClusterProvisioner” portion of our cluster.yaml for the new Node Pool we added the additional line to use a specific AMI. This AMI included the latest kernel.
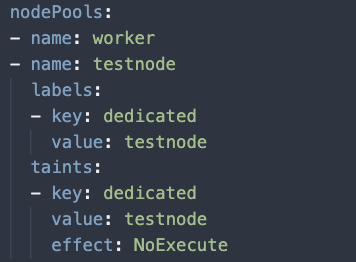
Also under the nodePools portion of the ClusterConfiguration of the cluster.yaml, add the following labels to the testnode Node Pool.
2. Once the cluster.yaml contains the new Node Pool and the taints, use Konvoy to add a new node to the cluster by executing:
konvoy up -y With two very simple steps, Konvoy completed adding the new node to the cluster. For this case, however, we needed to disable kmem as well, which required an additional step outside of Konvoy since it is not default in the upstream CentOS AMIs. For this step, we created two simple Ansible playbooks so that we could automate this action across the Cluster later. These playbooks can be found here, if you are interested.
Finally, we deployed a test Pod based on the failing CI job that we left running over a couple of days to see if we could reproduce the error.
kubectl apply -f test-pod.yaml
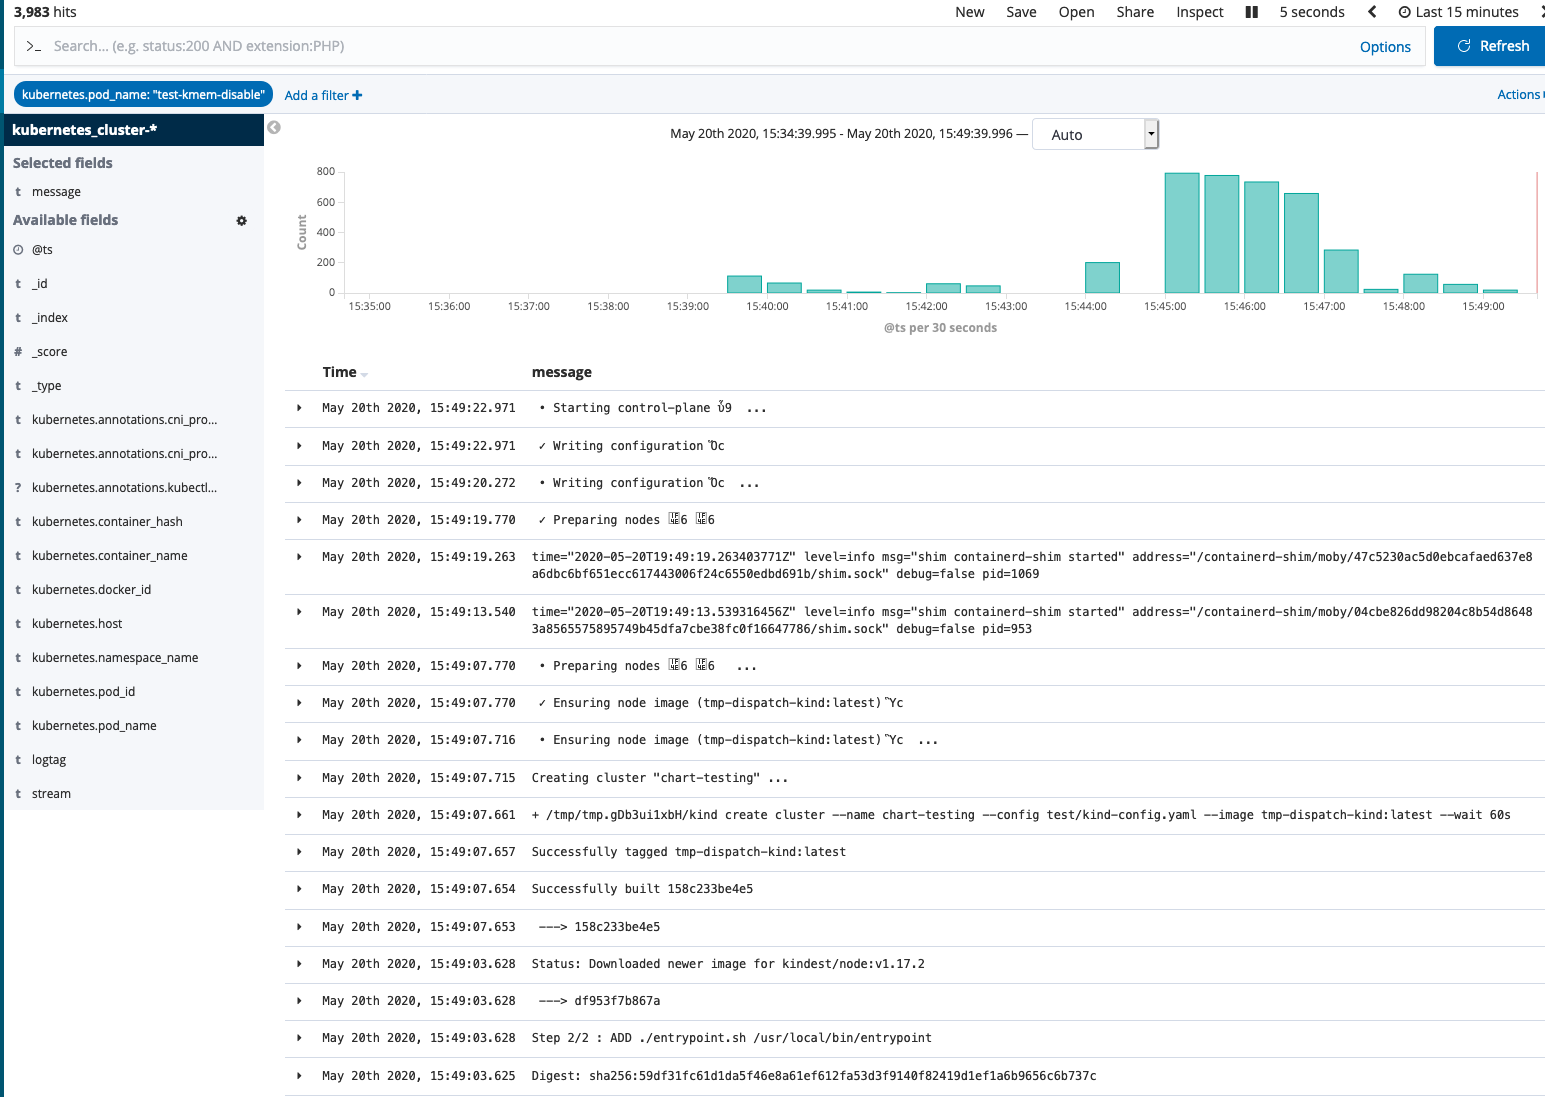
Over the next few days, we checked Kibana (which is part of our default Cluster deployment) for the Pod logs every few hours to see if we were able to reproduce the same error or if the issue had disappeared.
The Resolution
After 72 hours or so without seeing the errors return, we decided this would be a valid workaround to patch our Cluster. We needed to ensure that the CI job runs on nodes that contain both the latest kernel version, as well as disables kmem accounting used in the test above. In order to achieve this outcome, we patched our cluster with the same process we followed in the Test. Only this time, we also need to move our workload over to these new worker nodes. The following steps describe how we used Konvoy to apply the same process used in the Test to finally patch our Production cluster and remove the issue.
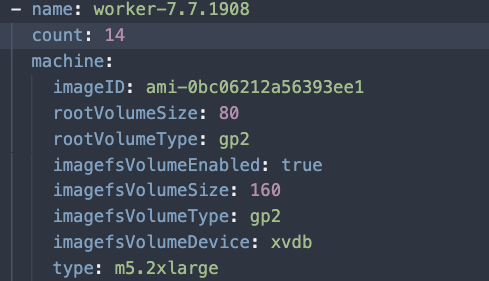
Since every worker node was vulnerable to the issue, we needed to create a new Node Pool that was an exact replica of the current one used to run the CI jobs. In the cluster.yaml, we created a new node pool called “worker-7.7.1908” with the same count as the current worker node pool.
konvoy create nodepool worker-7.7.1908 konvoy scale nodepool worker-7.7.1908 --count 14
Same as above by adding the new AMI to the pool, but we leave off the taints in this case, since we want to go ahead and let all workloads have the ability to run there.
In this case, we will need to reboot our nodes to ensure that kmem accounting is completely disabled. Using Konvoy, we will first only provision the new infrastructure with the provision argument before adding the nodes to the Cluster.
konvoy provision -y
Pro Tip: You can pass the --plan-only option before actually making changes. This will show you the Terraform plan to see if any changes are about to be made to your infrastructure.
Once our new instances are provisioned, we can run our playbooks to disable kmem.
ansible_ssh_extra_args='-o StrictHostKeyChecking=no' ansible-playbook playbook-disable-kmem.yaml -i inventory.yamlansible_ssh_extra_args='-o StrictHostKeyChecking=no' ansible-playbook playbook-validate-kmem-disable.yaml -i inventory.yaml
Once we have ensured that kmem is disabled on the new pool, we can use Konvoy to finally add them to the Cluster.
konvoy deploy -y
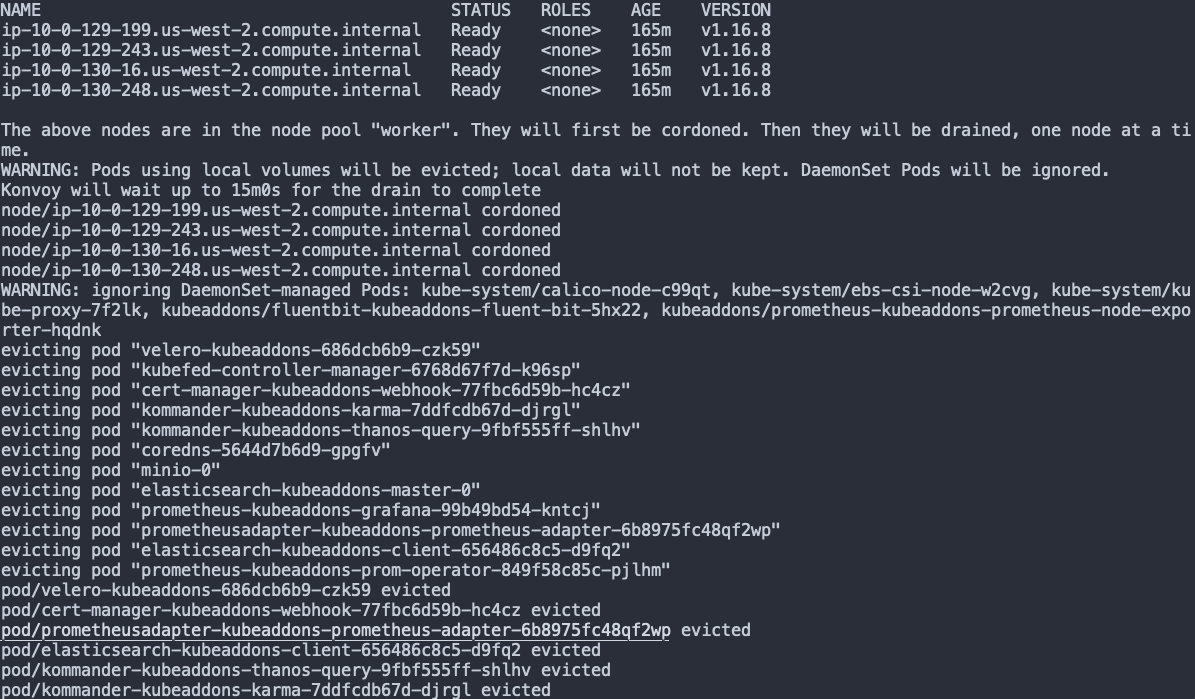
Now that the new nodes are added to the cluster and are ready to receive workload, we can safely drain the current workload off the current Pool with Konvoy. Note that this will likely take some time to complete.
konvoy drain nodepool worker -y
In this step, Konvoy will not only drain the worker nodes but also cordon them so that nothing else will be scheduled to run on them. Example output is provided below:
Now we scale our old Node Pool to 0.
konvoy scale nodepool worker --count 0
Finally, we can terminate and remove the old worker pool from the Cluster
konvoy up -y
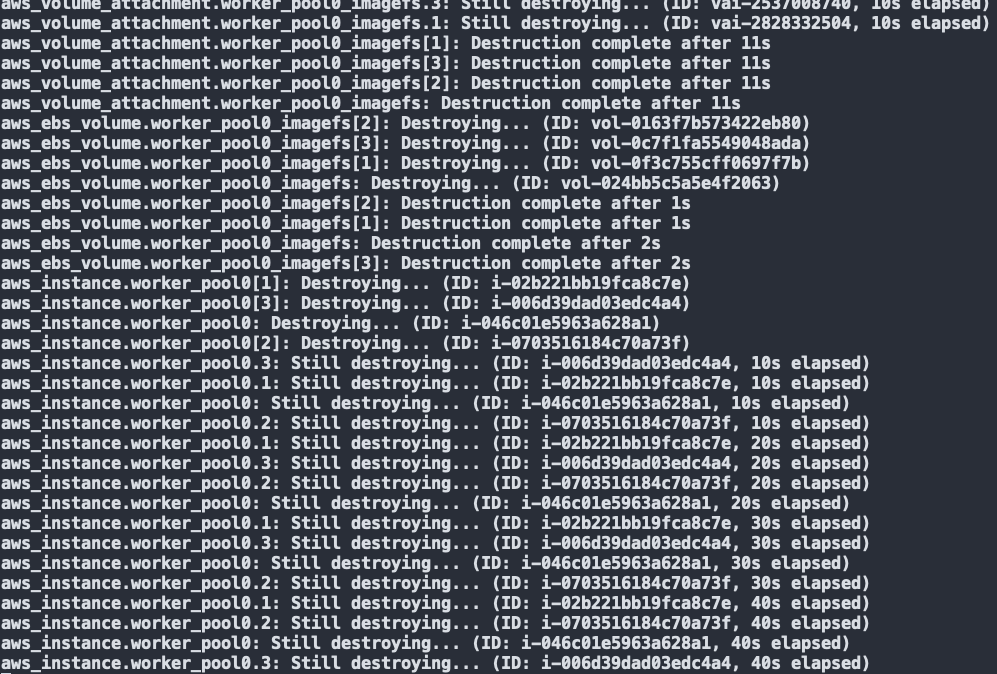
As you can see, the old worker pool instances and associated resources are now being terminated and removed from the Cluster.
This is just one example of how Konvoy can simplify Cluster patching and also save you time when your Cluster runs into issues such as the one described above. Cluster patching can be a daunting task, and therefore is not even considered as part of the management tasks over the lifetime of your Cluster. Hopefully, you can see how user-friendly and efficient we have made the Cluster patching procedure with Konvoy. In future blogs, we will continue to discuss how you can use Konvoy to further patch your Kubernetes Cluster and other Cluster management aspects in upcoming posts, so be sure to check back soon.